Managebac
How to use ManageBac for CAS
The CAS portfolio needs to be recorded on ManageBac. The CAS portfolio page on ManageBac is user friendly ones you now how to use it. Below you will find some short step-by-step tutorials on how to use the MB CAS portfolio.
The CAS portfolio needs to be recorded on ManageBac. The CAS portfolio page on ManageBac is user friendly ones you now how to use it. Below you will find some short step-by-step tutorials on how to use the MB CAS portfolio.
|
Joining CAS groups |
Adding CAS experience/project
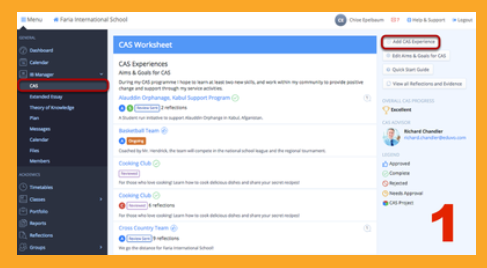
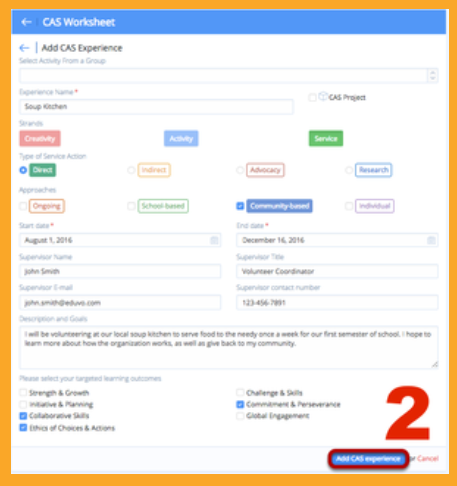
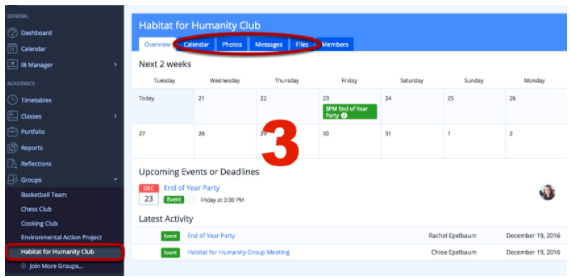
Go to your CAS portfolio by going to the IB manager in dark blue menu. Ones you click on it, it will show you a dropdown menu from which you select the CAS option. Now your CAS portfolio appears, Go to the top right corner and click on 'Add CAS Experience' Ones you have filled in all the required fields, Click Add CAS Experience to add the Experience. This will automatically send an email to your CAS advisor for approval. |
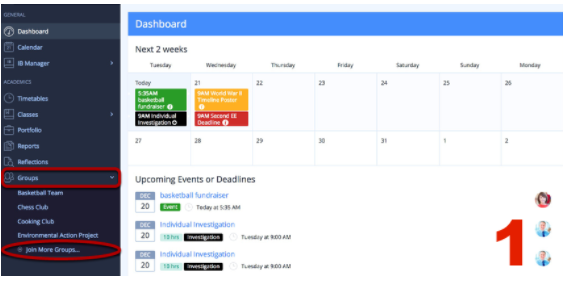
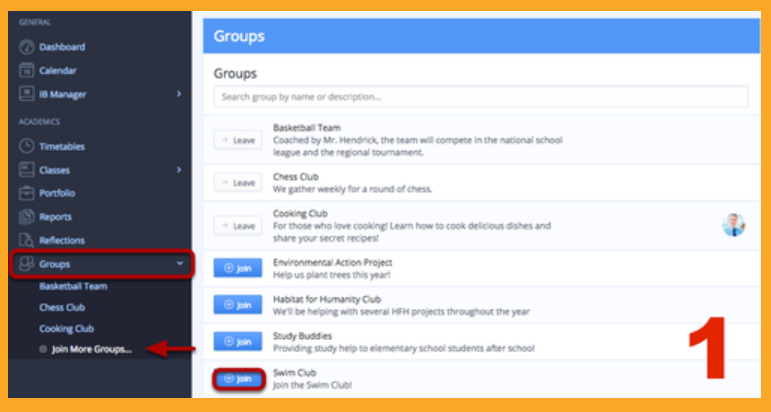
The Groups tab is where you can view any experience groups that you are a member of. Click Join More Groups... to see a full list of groups available at your school. Groups must be created by a teacher or advisor.
|
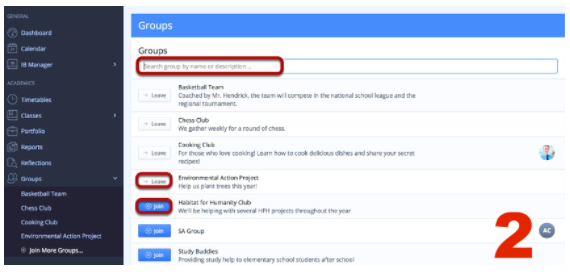
You can search groups by name or description. Click Join to join a group, or Leave to leave a group.
|
Joining a group will add it to your groups list on the left navigation panel. This will also allow you to post new events, photos, messages or files specific to that group.
Once you have joined a group, you can use it to auto-populate CAS experience fields when adding the experience to your CAS worksheet. See more about this in the next tutorial. |
|
Adding CAS Experience From CAS Group You can also add an existing experience to your CAS worksheet by joining an experience or group under the Groups tab. Click on the Join More Groups link to view all available Groups. Then, click on the Join button next to a Group. Groups you have already joined will be listed on the left under the Groups tab. |
|
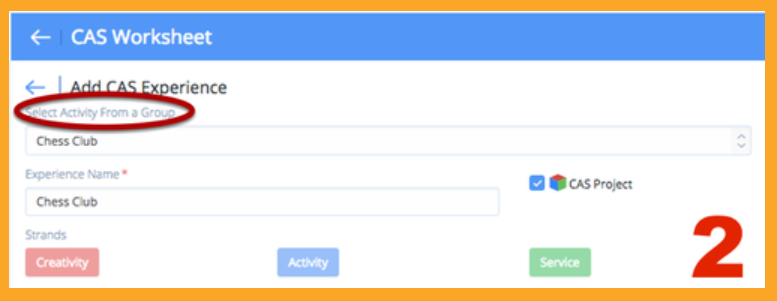
Once you have joined the group, it will then appear in the dropdown menu under the Add CAS Activity page. Selecting a group you have joined will auto-populate certain fields.
|
Completing Reflections & Evidence
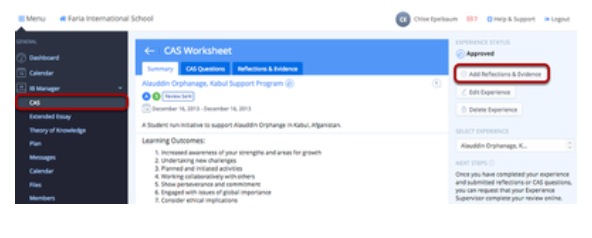
Start by navigating to your CAS Worksheet and select the experience you want to add to. Click Add Reflections and Evidence in the right navigation panel. |
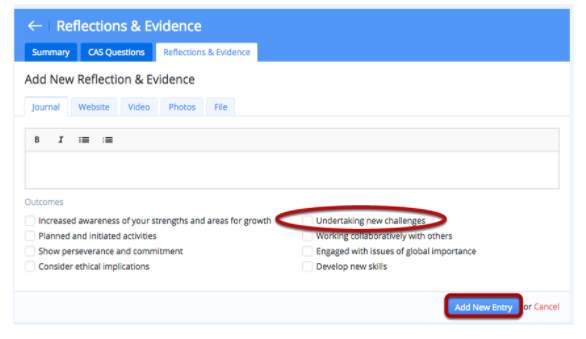
Here you can add a journal entry, website link, video, photo, or file. Please note that each file and photo must be under 500 mb. Reflections and evidence must be linked to one or more of your targeted learning outcomes. |
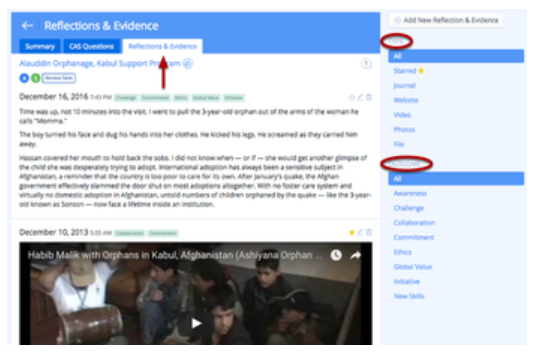
After adding reflections, you can access the Reflections & Evidence tab at the top of the page to view all your entries.
You can also filter these entries by outcome and type from the right navigation panel. |
|
Completing CAS Questions
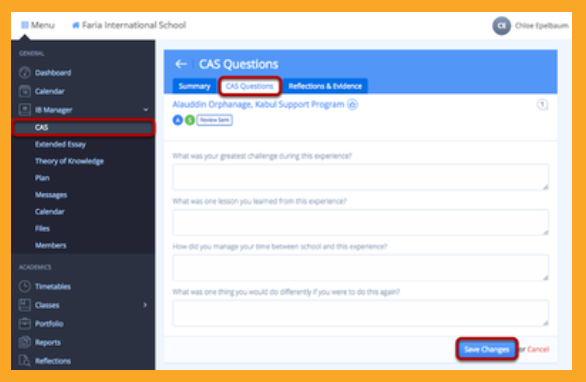
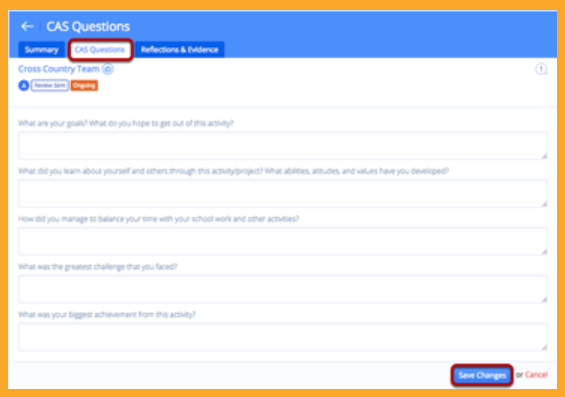
The CAS Questions tab will be activated if your CAS Coordinator prepares the questions for you. If CAS Questions are created, you can access the CAS Questions tab on the top of each experience page. Make sure to click Save Changes at the bottom whenever you update this page. |
|
|
|
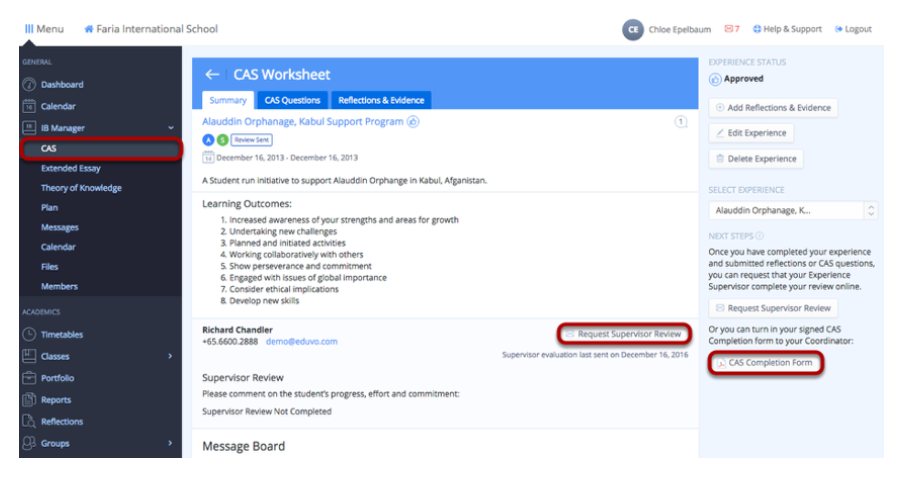
Obtaining a Supervisor Review
If your experience has been approved and all reflections and evidence have been added, you can click Request Supervisor Review. This will send an e-mail to the experience supervisor to review online. The Supervisor Review email will also contain the experience Reflections & Evidence. Alternatively, you can click CAS Completion Form. This will create a PDF of the experience information which can be printed and signed by the experience supervisor. The CAS Completion Form will not include the Reflections & Evidence. Note: The Supervisor email will be locked once students click Request Supervisor Review. Once the experience has been marked as Complete, students will no longer be able to add additional evidence or edit any of the experience details. |
|
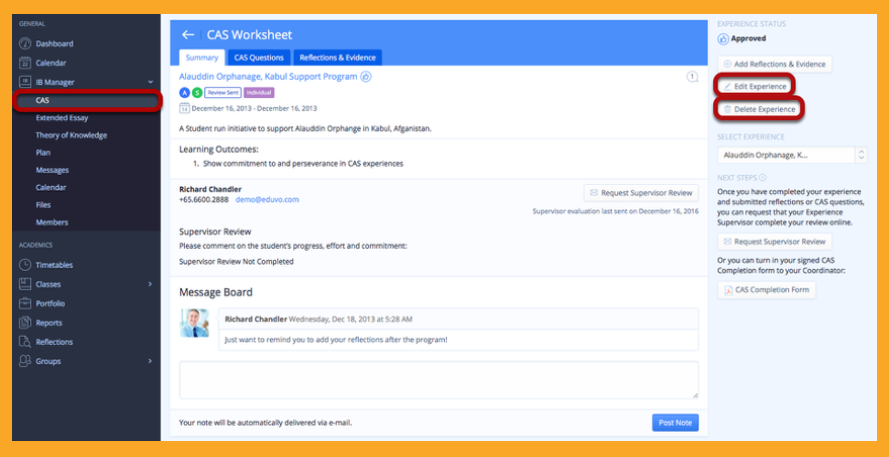
Editing or Deleting CAS experiences Navigate to any chosen CAS Experience within your CAS Worksheet. To edit or delete the experience, click Edit Experience or Delete Experience on the right. |
|
|
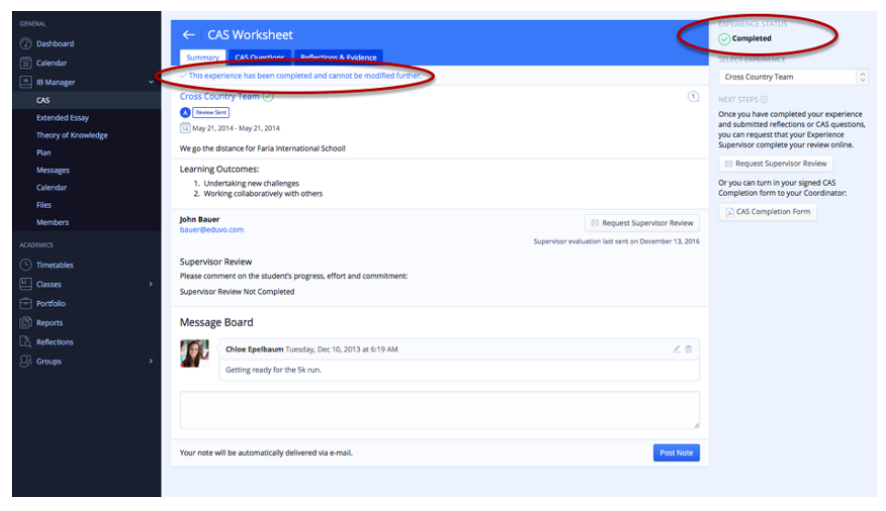
Unlocking Completed Experiences If you are unable to add reflections or update an experience you must request that your CAS Advisor or Coordinator change the experience status from Completed. CAS experiences will be locked after they are marked completed by your advisor, if for whatever reason you have to add or change anything go talk with your Advisor. By clicking on the specific experience, your CAS Advisor or Coordinator simply needs to change the status to Approved. Once this is done, you will be able to update your experience and add reflections. |
Analyzing your CAS programme
Your CAS worksheet has two analytics tools designed to help you keep track of your added CAS experiences.
Your CAS worksheet has two analytics tools designed to help you keep track of your added CAS experiences.
|
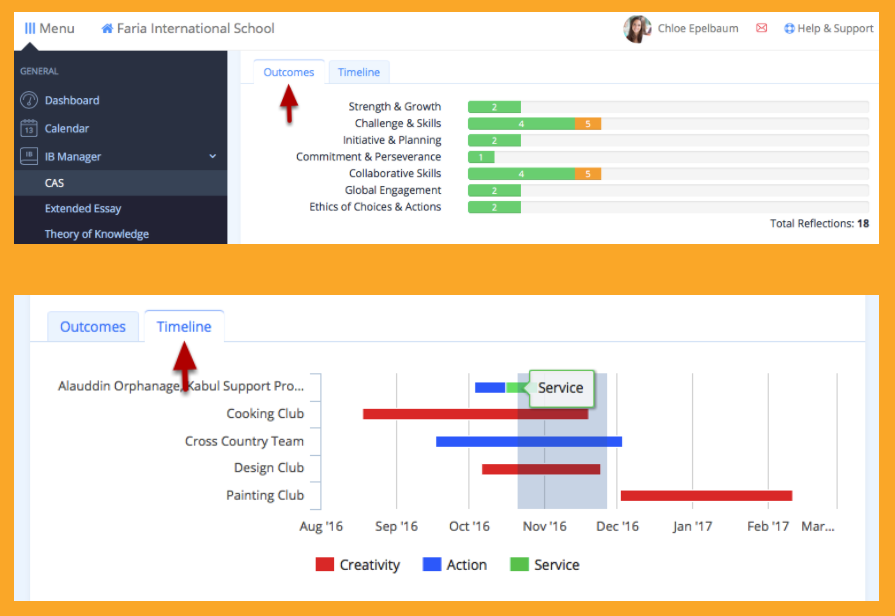
The Outcomes tab shows how many times a learning outcome has been selected during your CAS programme. Yellow bars indicate activities that have been planned and approved. Green bars indicate activities with completed reflections. The Timeline tab shows the length of each experience, as well as the type of experience (Creativity, Action or Service) it is. To zoom in on any section of the Timeline, click and drag your mouse over the desired area. The screen will automatically zoom in to show you the section highlighted by your mouse. |
|
